
This post may contain affiliate links. If you click on one and purchase something, I may receive an affiliate commission — at no extra cost to you.
Even though the Annapurna region is Nepal’s most visited trekking region in terms of the number of trekkers, I’d never heard of it until I started looking at what to do in Nepal and realized I didn’t have enough time to do Everest Base Camp. Turns out, the Ghorepani Poon Hill trek I did is one of the country’s most popular.
And it’s a great trek to DIY. Here’s how.
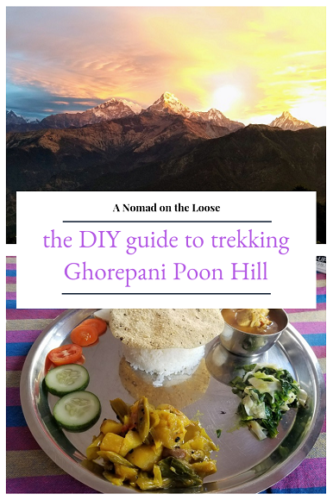
Table of Contents
DIY, or with a guide and porter?
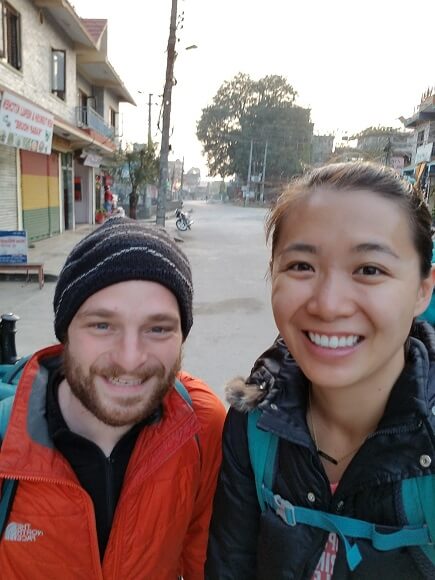
While I was initially thinking of doing the Ghorepani Poon Hill trek by myself, I decided against it after the sexual harassment I received in Kathmandu. Instead, I convinced one of the guys in my hostel to hike with me.
We were both adamant about doing it sans guide and sans porter, though.
I think having a guide and a porter can absolutely be worthwhile. And hiring them, especially once you’re in Nepal, is a good way to support the locals. But it wasn’t for us.
Poon Hill is known to be a well-marked trail, and generally, it’s pretty difficult to get lost there. (I say generally — stay tuned for more on this.) And personally, I’m more of a quiet hiker. Neither of us required a porter either, both feeling fully capable of carrying our own packs.
But it’s up to you to weigh your needs and interests.
Some friends who did Poon Hill a couple months after me did hire a guide and a porter. Upon realizing that the same man was going to be both (and also carrying his own stuff) though, they felt so bad that they chose to carry most of their own stuff.
If you do want to hire a guide though, here’s a well-rated private trek.
Getting your trekking permits
The first step to prepping to trek the Annapurna: getting your permits.
There are two separate permits you need:
- Annapurna Conservation Area Project (ACAP) permit
- Trekkers’ Information Management System (TIMS) permit.
The former is basically your entrance fee while the latter helps the authorities keep track of trekkers and keep everyone safe.
In Pokhara, you can get both of these permits in one office: the Nepal Tourism Board’s office in the Damside area of the city. There’s one counter for your ACAP permit and one for your TIMS. (And yes, the lot that the office is in looks oddly deserted and somewhat sketch, but it’s legit.)
In Kathmandu, you can get your ACAP permit at the Nepal Tourism Board office in the Bhrikutimandap part of town. While in the area, you can swing by the Tourist Service Center to get your TIMS. Otherwise, the TIMS permit is also available from the TAAN (Trekking Agencies’ Association Nepal) office in the Maligaon part of town.
To get your permits, you’ll need your passport, cash, and a passport photo for each permit. For the independent trekker, each of these permits costs 2,000 NPR (lower for citizens of SAARC countries).
If you’re going with a trekking company, they’ll typically get these permits for you. TIMS cards are also cheaper for group trekkers (1,000 NPR instead of 2,000).
Pro tip: bringing extra passport photos with you is a good idea when traveling to Nepal. Besides using them to get your trekking permits, you’ll also need them to buy Nepalese SIM cards and do other things as a foreigner.
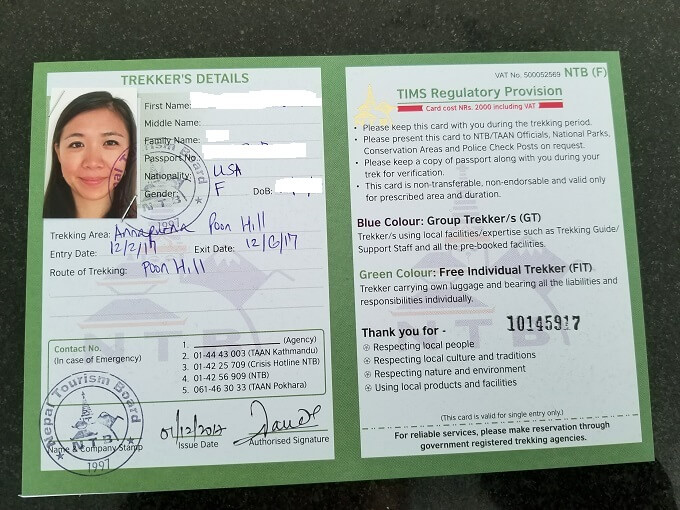
Last note: if you’re also trekking elsewhere while in Nepal, keep in mind that you need a separate TIMS permit for each trekking route.
What to pack for trekking
Packing efficiently is a good idea regardless of whether you get a porter or DIY, but it’s especially important when you’re carrying your own pack.
- Clothes: what you’ll need obviously depends on the season, but layers are key, especially in the winter. Hats and gloves are also good ideas in the cooler months.
- Sturdy hiking shoes: I hiked Ghorepani Poon Hill in a pair of Columbia hiking boots. These Salomon ones are my current ones as of 2022.
- Hiking poles: I initially wasn’t going to get any hiking poles, but I’m so glad I bought some used ones off another traveler who had just finished her trek. They’re super useful on the stairs and on the descent!
- Sleeping bag: this is crucial in the winter when guesthouse blankets may not be enough. Sleeping bags are easily rented in Pokhara supply stores.
- Sleeping bag liner: let’s just say we had some uncertainty about how well our rented sleeping bags were washed after last use.
- Headlamp: especially useful during your hike in the dark up to Poon Hill.
- Water supply: while you can buy water along the trail, I’d recommend bringing two one-liter water bottles and a pack of Aquatabs so you can purify water along the route instead.
- High-calorie snacks: granola bars, Snickers, you name it.
- Nighttime entertainment: reading material, movies, whatever floats your boat.
- Your permits!
- Cash, typically the only type of payment accepted
No worries if you arrive in Nepal and realize you’re a little light on the cold-weather clothing or hiking gear, or if you find that you need something extra for trekking during monsoon season. There are tons of shops in Kathmandu and Pokhara that sell (and rent) parkas, pants, hats, and all that.
How to get to Nayapul to start the trek
Nayapul is approximately 43 kilometers (~26.7 miles) west of Pokhara. The easiest way is to hire a taxi to drive you there. Prices are typically between 2000-3000 NPR (roughly $17-$26 USD), and it’s a roughly 90-min drive.
If you’re on a budget and down for more adventure, however, take the local bus instead.
Make your way to the Baglung Bus Park in Pokhara and ask for the local bus to Nayapul. The ticket is 150 NPR and the ride is just a little over two hours.
Buses to Nayapul supposedly leave every 30 minutes from 5:30 a.m. to 3:30 p.m. We got on the bus around 8, and our bus left around 8:20 when it was a tad over full. (There were a few folks standing without seats.) So, give or take.
I won’t lie, though. It’s not the most pleasant experience.
At 5’9”, I’m a little bigger than the average Nepali. My legs didn’t fit and kept on hitting the seat in front of me so frequently that I eventually had to ask a local who was shorter to swap with me so I could sit in the center of the back row. My knees got a break since there was no seat in front of me, but thanks to a lack of seatbelts, my arms got a workout as I braced myself against the bumps and potholes that were seemingly everywhere.
On the way back after the trek, you can do the same thing: hire a car or flag down the bus. Despite the bumpy experience, we still took the bus on the way back.
Taxis in Nepal are pretty small, and I hit my knees against the seat in front of me and my head against the roof of the car every time I was in one. Plus, it’s not like the taxis are able to escape the potholes and road issues.
Plus, it’s how the locals travel. Go experience it.
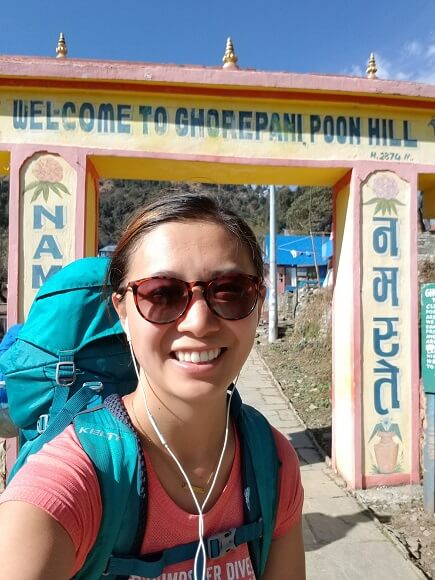
Kicking off your Ghorepani Poon Hill trek
To be honest, I’m not 100% sure exactly where the bus drops you off in Nayapul because ours decided to make a stop in downtown Nayapul.
The driver was taking his sweet time for so long that we decided to get off and walk toward the TIMS checkpoint in Nayapul instead. The locals are more than familiar with trekkers, so a few questions and gestures to any friendly face will help guide you in the right direction.
Once we registered at the TIMS checkpoint, we followed the trail to Birenthanti, where you enter the Annapurna Conservation Area and where the ACAP checkpoint is.
Make sure you register at both checkpoints before you start the trek. From the ACAP checkpoint, you simply follow the trail to kick off your hike.
Where to hike, stay, and eat
The Ghorepani Poon Hill trek is labeled as a 4-7 day route because it is really dependent on the physical capabilities of each person and on what hours they choose to hike.
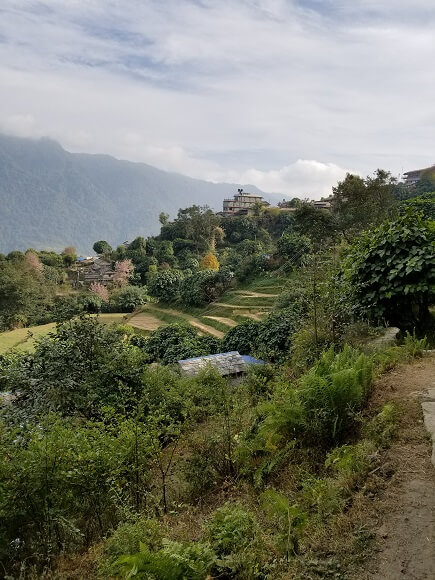
There are 11 villages between Nayapul and Ghandruk, the last village on the trek. You can stay at guesthouses in any of them, so it’s up to you how to segment your trek. One key thing to keep in mind while deciding your trekking plan is that you’ll most likely want to stay one night in Ghorepani itself so you can see the famous sunrises of Poon Hill.
The guesthouses are generally lodging-restaurant combos, so there are plenty of food options each day. (We only ate real meals once a day though because we didn’t feel like stopping until we got to our guesthouse each afternoon. We just had granola bars the rest of the time.)
Food prices are definitely higher than elsewhere in Nepal, but keep in mind that it’s also harder to bring provisions up the mountains.
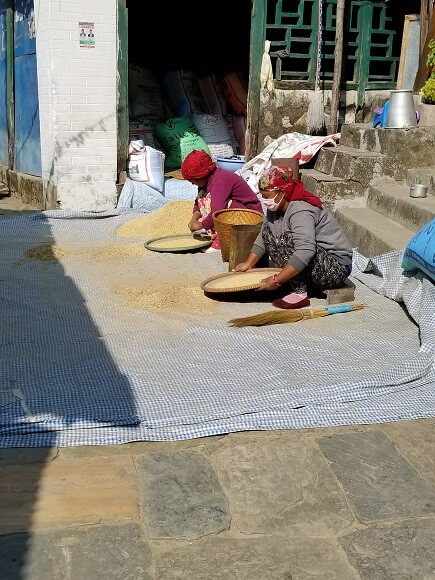
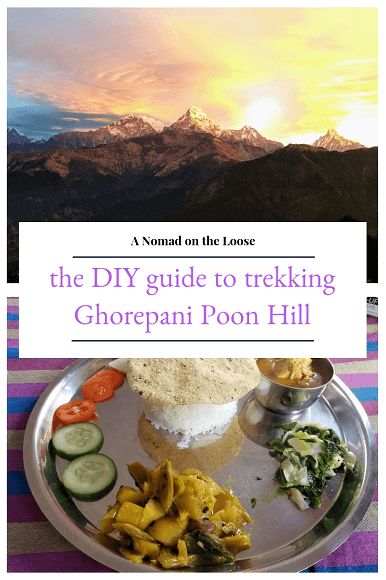
The most typical trekker meal is dal bhat, the traditional plate that includes rice, vegetables, lentils, and more. On the trails, dal bhat comes with refills for everything but meat (one refill or unlimited, depending on the guesthouse) and is known as the most filling and budget-friendly option.

Accommodations are typically simple rooms either with a private, attached bathroom or a shared one in the hall. Hot showers are rarely included in the price though, so keep that (and wet wipes) in mind.
During the low season, there are tons of guesthouse options so you can just walk into one and ask for a room. During the high season though, it can be tricky as an independent hiker. You’ll want to show up earlier rather than later to make sure you have a place to stay — or have enough daylight to trek to the next village for other options.
Prices are definitely cheaper and more negotiable during the low season, and the trail itself is much less crowded. (High season is September-November and March-May.)
Pro tip: download HoneyGuide’s Trekking in Nepal app. It has a number of free guides for trekking in the Annapurna region and was supremely useful to us during our DIY hike. It helped us gauge where to go and provided some ideas for guesthouses to stay and eat at.

How we split up the trek…and on not getting lost
We didn’t want to get up too early to get from Pokhara to Nayapul, so we decided to do the Ghorepani Poon Hill trek in 4 days. Two days to get up to Ghorepani and then two days down and back to Pokhara.
By the time we got through the checkpoints, it was past 11 a.m. It took us approximately 2.5 hours to get from Birenthanti to Tikhedhungga and then another 80 minutes to Ulleri. (I would highly recommend Kamala Guest House in Ulleri.)
This second segment is known as the part with the crazy steps, as there are roughly 3200 stone steps. This is where those hiking poles can really do you and your knees a favor.
Day 2 was relatively short. We took our time getting ready in the morning and hiked for approximately 3 hours and 20 minutes. We were in Ghorepani by 2:30 p.m. and had the rest of the day to chill and relax.
If you can get a guestroom with a private bathroom in Ghorepani, do it. It’s worth not having to wait for the shared bathrooms since everyone gets up around the same time to hike up to Poon Hill for sunrise.
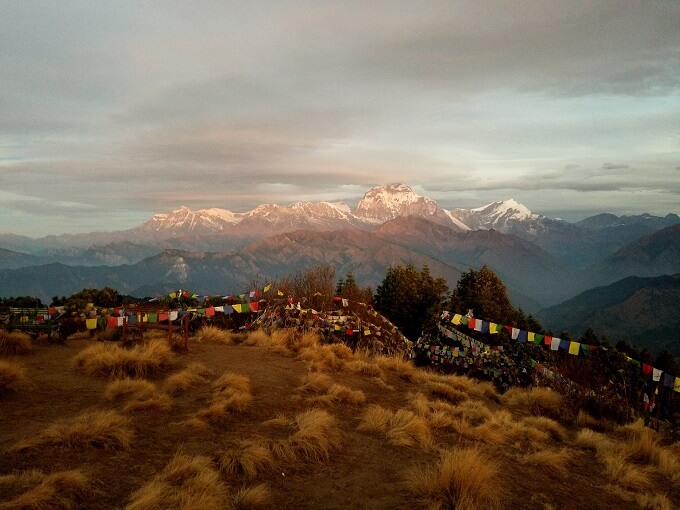
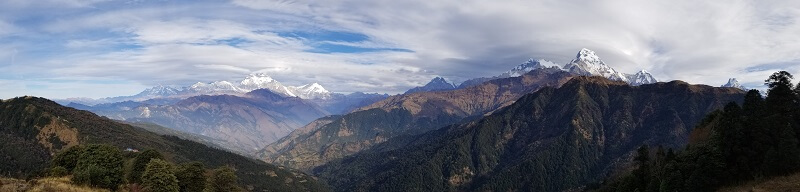
Day 3 is the climax, the day where you get to see this gorgeous Poon Hill sunrise and the million others as the rising sun paints the landscape.
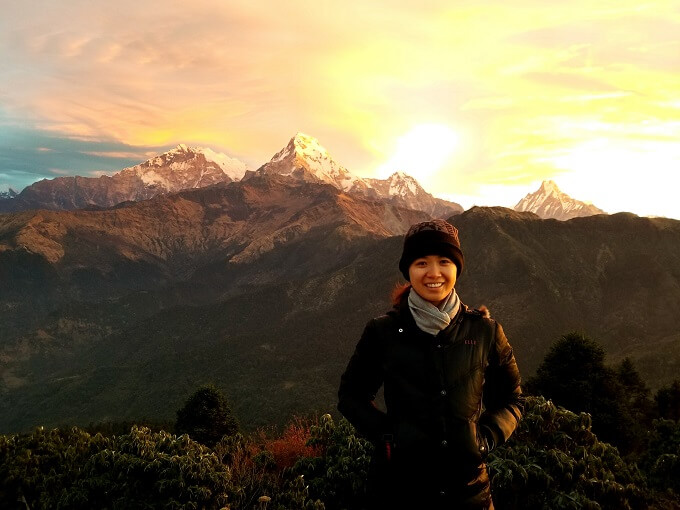
We left our guesthouse around 5:25 a.m., though I reckon you’ll have to wake up much earlier if you’re hiking in the summer. (See more photos of the Poon Hill sunrise here.)
Once we got back down to Ghorepani, it was approximately 85 minutes to Deurali, an hour to Banthanti, and then another hour to Tadapani, almost all downhill.
It was around the town of Bhaisikharka where yours truly accidentally got off the trail despite everyone saying it’s impossible to get lost on the Ghorepani Poon Hill trek.
Pro tip: stick to the trail that goes through the villages. That’s how you make sure you’re on the trekking trail.
But no worries if you go off route as I did and end up on the locals’ trail. While it’s rougher to hike through thanks to more small rocks and loose dirt (dotted with muck), I ended up in Ghandruk all the same. Just took a little longer and a lot of locals having to point me back to the main tourist part of Ghandruk.
On the flip side, I got to check out the northern side of town that most trekkers don’t see.
To wrap up our last day on the Ghorepani Poon Hill trek, we hiked about 4 hours to Nayapul and then took the local bus back to Pokhara.
Total cost to trek Ghorepani Poon Hill on your own
Permits: 4000 NPR for the TIMS and Annapurna permits
Trekking equipment and provisions: 2990 NPR for things such as cold-weather accessories, used trekking poles, snacks, and Aquatabs
Transportation to and from Pokhara: 450 NPR for the local buses plus a taxi from the Pokhara bus stop to downtown
Lodging: 600 NPR (per person) for 3 nights in double rooms (some with attached bathrooms, some without)
Food & beverage: 3140 NPR for various meals at guesthouses and some streetside snacks during bus stops between Nayapul and Pokhara
Admission fees: 125 NPR for entrance fees to Poon Hill and museums in Ghandruk
Total cost to DIY the Ghorepani Poon Hill trek: 11,305 NPR, or roughly $108 USD at the time
Pin it to save it for your future trek. Happy trails!
This is a great guide for the trek! I always find it a bit funny (if not somewhat disappointing) when you think you’ve stumbled on something extraordinary, only to later find out it’s very popular! Also loved the bit about your arms getting a workout in the bus. Can definitely relate to that. Although I actually have the opposite problem with legroom since I’m ridiculously short.
Thanks! Haha at least you’ll fit in more with the local population than standing out — literally!
Amazing post! So helpful, I defintelty feel more confident about doing this without a guide! Thank you so much!
So glad to hear, this is why I write! Have an amazing trek ?
[…] how all that breaks down on the hiking trail? Check out the full cost breakdown plus tips for trekking the Ghorepani Poon Hill trail on your […]
[…] capital, it feels like a tranquil respite. Plus, it’s the perfect jumping off point for trekking the Annapurna mountain […]
Thanks, a lot for sharing the meandering story of your Ghorepani Poon Hill trek, your story inspires the others (novice or experienced travelers to visit Poon hill viewpoint).
Thank you rowena for an add on to my confidence to go solo.
I’m so glad to hear that, Rahul! Have an amazing and safe trip 🙂
Thank you for writing this helpful article, Rowena! I am thinking of doing Poon Hill trek solo as much as possible because like you, I am a quiet hiker who prefers to spend some quiet time by myself in nature. However, I am concerned about getting lost, limited accommodation during peak period (as i’ll be going this Nov) and general safety as a female trekker. Would love and appreciate to hear your advice regarding these aspects! Thank you 🙂
Hi Sin Hui,
Apologies for the delay. You caught me when I was on vacation and off the grid.
As you read, I did get a little lost the last day, ha. But it was a manageable lost as folks just shook their head at me and pointed me toward the right direction. Generally, the rule of thumb I learned after is to make sure you are always going through villages and water sources/taps. If you come to a fork in the road and are unsure, always take the one that looks better maintained and leads to a village.
The good news is that if you’re going in November when it is busier, you are unlikely to get lost because there will be more folks on the trail. Many of the guides are plenty friendly and happy to make sure you’re staying on the right path even if you’re not with them.
As for accommodations, there are a couple of options. Once you get to Pokhara, you can have someone at your hotel or hostel help you out and call ahead to a few guesthouses and try to reserve rooms. Or you can make sure to get up earlier and get to destinations before others. The villages I stayed at aren’t the only ones either. Sometimes, during busy season, you’ll just have to go a little further to another village. If guesthouses don’t have single rooms anymore, you can also try to pair up with another solo hiker and share a double room. Lastly, I would not worry about not having shelter over your head. Worst come to the worst, the Nepalese people are very hospitable and will provide you blankets to sleep on the floor so you’ll at least be inside.
On safety, again, during busier months you should have no problem. You can also try to stay in visual proximity of other hikers to provide an additional sense of safety. Another tip is to either not engage if someone’s harassing you or engage directly. I only had one instance when some young men made remarks that I just ignored. But you bet I kept my guards up and was very aware as I moved past them.
Hope this helps and enjoy the beauty of the Annapurna!
Rowena